Get to your next destination faster with personalized searches in AmiGO
&w=256&q=90)
TomTom’s driving companion app, AmiGO, is constantly evolving, and the company is continually working on new features suggested by the community. One of the latest to be rolled out to the app is vehicle personalization. It helps you get to your destination faster with personalized searches.
We all remember the day when we got our first car. It’s a big moment in many people’s lives as it represents the first day of true freedom and independence; the first step to becoming an adult.
You probably spent many hours picking your favorite model, its trim, and color before buying your car, unable to wait for that first drive out of the parking lot. It’s at that moment when we fall in love with our cars if we hadn’t already.
Well, now you can recreate the fun of personalizing your vehicle all over again as TomTom has just released the ability to add, and personalize, your vehicle to your ‘Profile’ in AmiGO!
Let me explain what that means...
What is ‘My Profile’ in AmiGO?
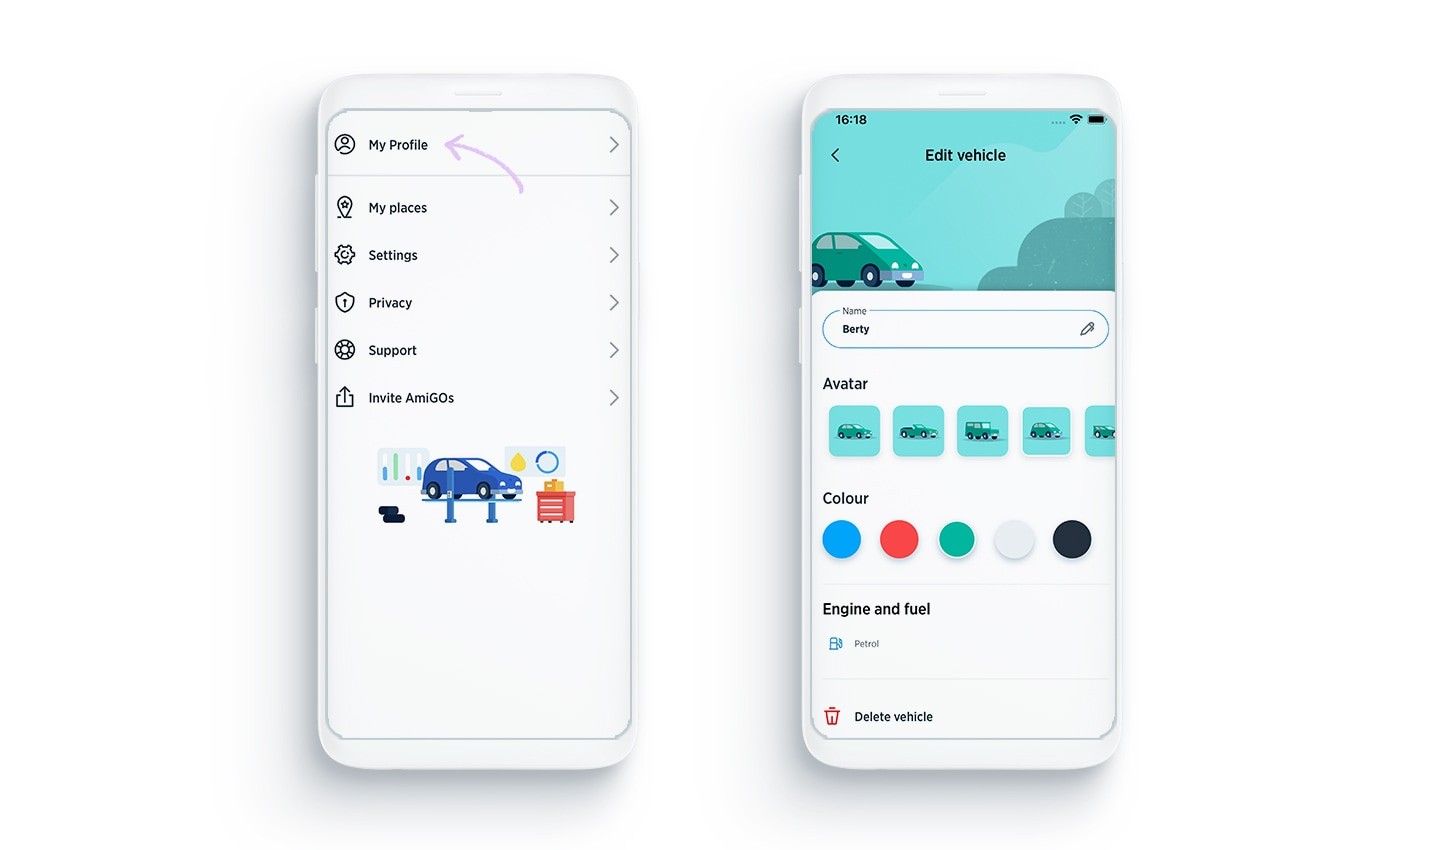
Before setting up personalization, you need to go to ‘My Profile’ in the AmiGO app. Once you've done that, you can now customize your vehicle, giving it a name, a body type, color and fuel type.
Before we get started, check out the new ‘My Profile’ tab in AmiGO’s menu. Here you can add your vehicle and choose from a whole bunch of customization options.
This opens many possibilities for personalization in AmiGO, and we’ve recently added some useful changes that will happen after you add your vehicle.
By adding your vehicle information, this helps us to fine tune our routing and related information like search and fuel, so it is more relevant to your vehicle.
So how do you enable these handy features in AmiGO? Well, it really is quite simple...
How to add your vehicle?
First things first, you can add your vehicle to AmiGO and tell it some important details about it.
To do this, navigate to the drawer menu by clicking the ≡ button on the home screen, and then click ‘My Profile’.
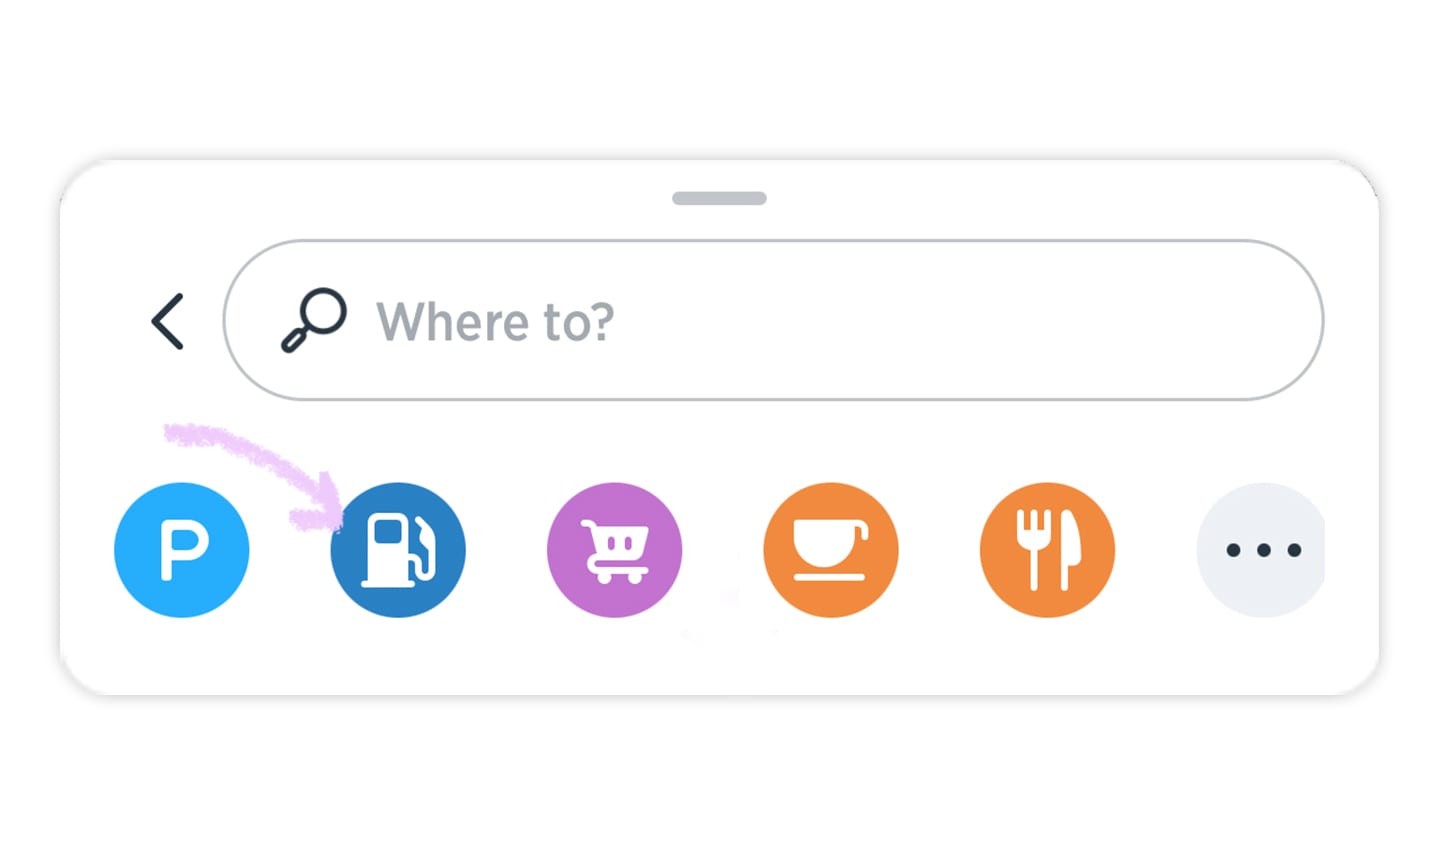
Next, click on your vehicle type. Then, you will be asked to input what kind of fuel your car uses. If you drive an electric vehicle, you can tell AmiGO what kind of charger your vehicle requires.
Simply click on the fuel(s)/charging socket(s) you have (you can click multiple) and voila, you have successfully added your first vehicle to AmiGO.
Now that we’ve got the basics out the way, you can update your vehicle’s name, style, and even color, so have fun with it and relive those hours you spent picking out your car for the first time!
If you have multiple vehicles, don’t worry as you can add them all! Simply press ‘Add a new vehicle’ and follow the same process above to add your other vehicles. You can switch between them before you drive to benefit from how AmiGO personalizes the driving experience based on your vehicle.
So why should I add my vehicle?
The reason why you should try this out is simple.
Using AmiGO’s personalization features helps you find the right destination, faster.
By adding a vehicle, you gain access to a more personalized experience. For example, if you have an electric or plug-in hybrid vehicle, you will now see customized search results when you look for EV charging stations.
Gone are the days of checking which charging stations have compatible chargers, AmiGO will do all the hard work for you!
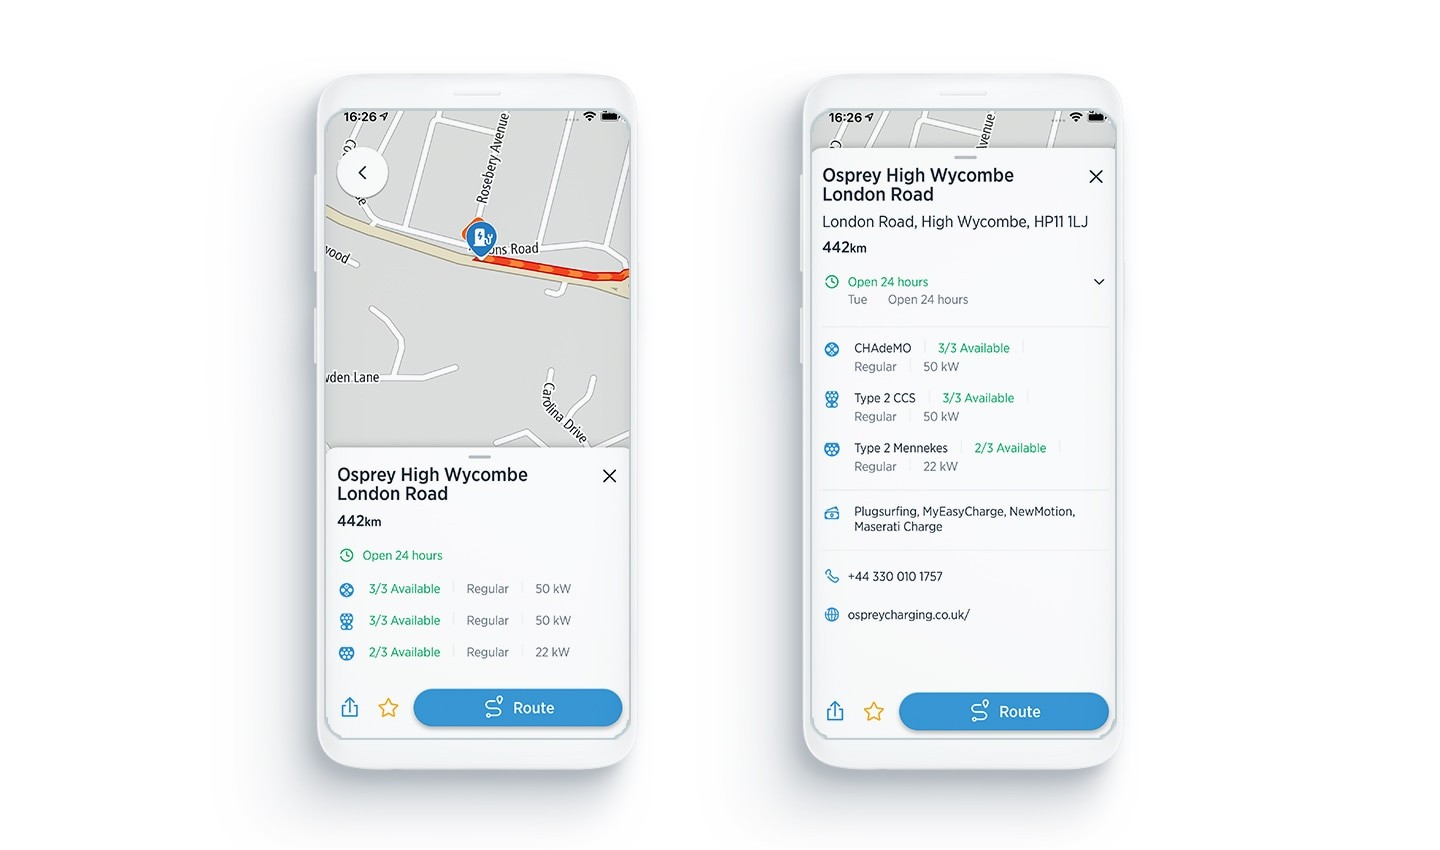
Get personalized charging point recommendations using AmiGO.
What’s more, you will also see which sockets are currently available at the station, so you know before you leave what to expect when you arrive.
We are continuously working towards improving the driving experience for everyone! So even if you do not have an electric vehicle, by adding your vehicle to the app you will help us to fine tune our routing to give you improved navigation in the future.
We hope you enjoy this new functionality!
As someone who loves when app developers continuously innovate, I’m excited to finally let you know about this feature we’ve been working on!
Now it’s time to enjoy your upgraded personalized driving experience...
We will continue to improve and add new features related to personalization, so please keep giving feedback about new functionality and what you’d love to see.
Send us a message
Let us know if you try out the new vehicle profile and what you like or dislike about it!
This blog was written by Katie Snell, TomTom AmiGO software engineer. You can read her other blogs here.
People also read
)
Never lose your way to a friend’s house again
)
People-powered navigation: Making everyday drives smoother with the AmiGO app
)
The increasing importance of in-vehicle experiences
* Required field. By submitting your contact details to TomTom, you agree that we can contact you about marketing offers, newsletters, or to invite you to webinars and events. We could further personalize the content that you receive via cookies. You can unsubscribe at any time by the link included in our emails. Review our privacy policy.